
Last Updated on October 1, 2026 by Wayne Rodick
Hydraulic cylinders do the heavy lifting on just about every piece of machinery, and that kind of work takes a toll. Sooner or later, something wears out. More often than not, it’s the seals. When a seal goes, you get fluid leaks, weak pressure, and – if you ignore it long enough – a failed cylinder and a much bigger bill.
Hydraulic cylinder seal replacement is one of the most common jobs we handle at Coastal Hydraulics. Understanding how it actually works can help you make smarter calls about repairs and when to schedule them.
How Professionals Replace a Hydraulic Cylinder Seal
There’s no winging it with this repair. Our technicians follow a set process, step by step, to get the cylinder back to full working order without cutting corners on safety.
Disassembling the Hydraulic Cylinder Safely and Correctly
First things first: we depressurize the whole system and disconnect the cylinder from the equipment. That part isn’t optional. Skip it and you’re asking for trouble. Once the cylinder is isolated, we clamp it into a vice or holding fixture and back off the end caps or gland nut with the right spanner wrench. Then the piston rod comes out of the barrel – slowly, and with a close eye on the rod surface, since a careless pull here can nick something you’ll regret later.
Whether you’re handling on-site hydraulic cylinder repair and rebuilding or working in a shop, this step sets the tone for everything that follows.
Removing the Old Seal Without Damaging the Hardware
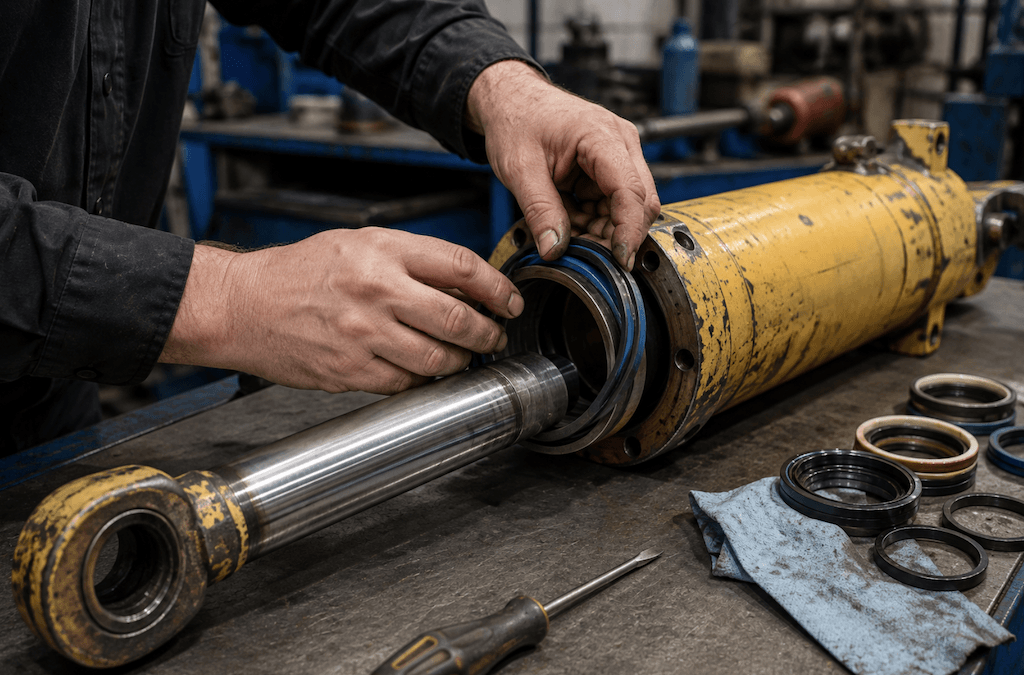
With everything apart, we go after the worn seals on the piston and rod gland. We use plastic or brass picks for this. Never metal – one scratch on a sealing surface and even a brand-new seal won’t do its job. So we take our time. Old O-rings, wiper seals, and backup rings all come out and get set aside so we can match them against the replacement kit.
Cleaning and Inspecting Every Component Before Reassembly
Here’s where we tend to find the problems hiding behind the leak. Every part – barrel bore, piston rod, end caps, gland – gets cleaned with a lint-free cloth and a compatible solvent. Then we put each one under good light and look hard for scoring, corrosion, or pitting. A scored bore or a chewed-up rod won’t seal, no matter how fresh the seals are. If we spot extra damage at this point – something that goes beyond replacing seals on a hydraulic cylinder alone – we call you before we go any further. No surprises.
Installing the New Seal Kit with Precision
Once everything is clean and checked out, the new seals go in. We wipe a thin coat of clean hydraulic fluid on each one first – it lubricates the seal, makes it slide into place easier, and cuts the risk of a tear. Each seal gets seated in its groove so it sits flush and even. A twisted or pinched seal is one of the top reasons a repair fails early, so our techs double-check placement before moving on.
Reassembling the Hydraulic Cylinder to Manufacturer Specifications
Reassembly is basically disassembly in reverse. We guide the piston rod back into the barrel and torque every end fitting to the manufacturer’s spec with a calibrated wrench. And yes, spec matters – crank it too tight, and you can warp the sealing surfaces, which causes the exact leaks you were trying to fix. Too loose is no better. Once it’s buttoned up, the cylinder’s ready for testing.
Testing the Repaired Cylinder and Troubleshooting Common Issues
Conducting an Initial Pressure Test After Seal Replacement
No cylinder leaves the shop untested. We hook it to a test bench and cycle it slowly through its full range at operating pressure. This is a key part of how to replace a hydraulic cylinder seal correctly – you don’t skip the test. It tells us the seals are seated right, and the cylinder is doing what it should.
Identifying and Addressing Hydraulic Fluid Leaks Post-Repair
After the test, we check every seal point for weeping or an active leak. A little seepage during those first cycles can happen as new seals bed in – that’s normal. Persistent leaking is not. When a seal keeps leaking, it’s usually an installation issue or damage we need to chase down, so we open the cylinder back up rather than hand you something that isn’t right.
Resolving the Most Common Problems That Arise After a Seal Job
Two issues show up more than the rest. One is rod seal leaks caused by a damaged rod surface – when there’s scoring, we’ll recommend repairing or replacing the rod, because a seal can only do so much. The other is early seal failure from the wrong seal material. We sidestep that by sourcing OEM-compatible kits matched to your fluid type and operating conditions.
FAQs
How Long Does It Take To Replace A Hydraulic Cylinder Seal?
Most standard jobs run two to four hours in our shop, depending on the cylinder’s size and shape. Find extra damage during inspection, and that clock stretches a bit.
How Do I Know If My Hydraulic Cylinder Seal Needs Replacing?
The clearest sign is fluid leaking from the rod end or the end caps. You might also feel less force, slower movement, or a system that can’t hold pressure under load.
Can A Hydraulic Cylinder Be Repaired Instead Of Replaced?
Usually, yes. A seal replacement brings back full function for a fraction of what a new cylinder costs. We only steer you toward a full replacement when the bore or rod is too far gone to fix affordably.
Restore Your Hydraulic Cylinder to Full Working Order
Done properly, a seal replacement adds years to a cylinder, protects the rest of your hydraulic system, and keeps your equipment earning its keep. Our team at Coastal Hydraulics has the know-how and the right tools to get it right the first time – whether that means how to replace seal on hydraulic cylinder questions answered on the spot, or a full rebuild back at the shop. Seeing signs of seal wear? Get in touch today, and we’ll set up an inspection and a repair quote!
Wayne Rodick is the owner and founder of Coastal Hydraulics, a company built on the principle of “Speed to Recovery.” A U.S. Navy veteran, Wayne developed extensive hydraulic expertise while maintaining F-18 fighter jets, where precision, reliability, and rapid service were critical. Today, he brings that same commitment to excellence to the hydraulic repair industry, leading a team dedicated to delivering fast, dependable repairs that minimize downtime and keep equipment operating at peak performance.